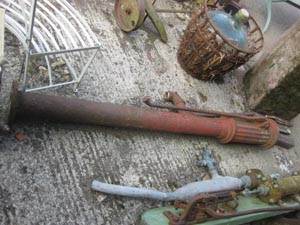
I bought an old pump from Leominster Reclamation, a handsome 6ft Thomas & Wilks model, minus its cap but otherwise complete.
Pump Restoration Project
| It started when I had
thoughts on replacing a pump that once stood behind the cottages where I live.
The original pump was still in use in living memory but when mains water
arrived it fell into disrepair, and was finally dismantled with a 5lb lump
hammer! I established that the borehole was still there, next door to me, and
that it was simply plugged with a piece of wood hammered into the
downpipe. I bought an old pump from Leominster Reclamation, a handsome 6ft Thomas & Wilks model, minus its cap but otherwise complete. |
|
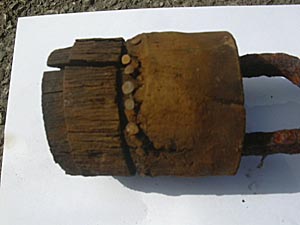
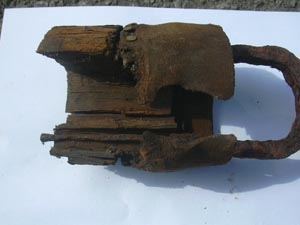
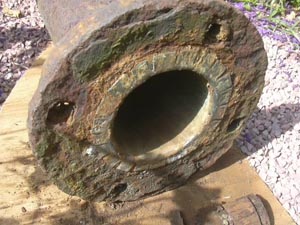
| On delivery, I found that the pump was copper lined and that the liner was in very good condition; this saved a lot of work - just a quick once-over with some fine wire wool wetted with olive oil. The main body was given a serious wire brushing followed by two coats of black Hammerite smooth. The plunger valve was a different story - being wood and leather, it was completely rotten and needed to be replaced. | |
 |
 |
 |
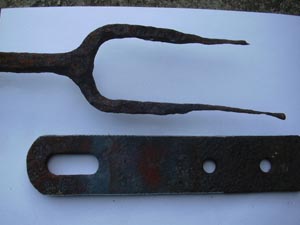 |
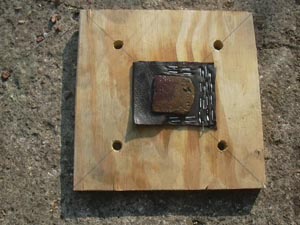
| The 'easy' way for me was to weld an old agricultural padlock hasp between the forks and replace the entire bucket and clack assembly with a 90mm one I bought from W. Robinson & Sons. |
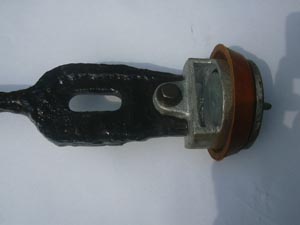 |
| Then it
was just a matter of measuring the stroke, cutting the old hasp to length, and
drilling a hole to bolt everything together. The leather cup washer was removed
and soaked in olive oil for a few days to soften it. On reassembly, I packed
the back of the cup washer with water pump grease. To check things out, a temporary baseplate and clack valve was knocked up from some plywood and scrap leather, the pump was stood in a bin of water and away it went. Knowing everything was working as it should, I could then progress to the next stage. |
||
 |
 |
 |
| Our next door
neighbour was very good and enthusiastic about my little project; he allowed me
free reign to excavate in his garden to find the old borehole. When the
borehole was uncovered, the first job was to plumb the depth using a nylon cord
and a lead weight, and water was found at around the 4 metre mark. The downpipe
was 2" bore and now knowing the water was there I could start ordering all the
bits that were needed to connect everything together. I bought 25m of 32mm
(25mm bore) MDPE and assorted fittings, a brass foot valve with strainer and an
in-line non-return valve (belt & braces). I measured up and drew out the
plan for a circular baseplate to close the bottom of the pump and allow me to
attach the MDPE. This was 18" in diameter cut from 13mm thick steel. A 1" od
tube was welded into the centre, 4 inner holes were drilled to allow me to bolt
the base to the pump and 4 outer holes to allow me to set the pump on the
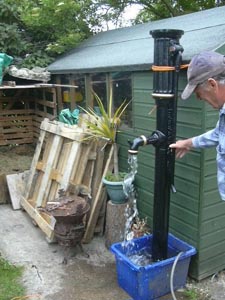
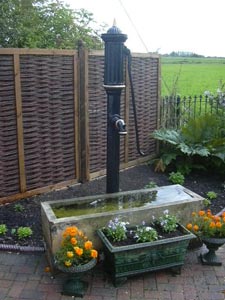
mounting. When bolted to the bottom of the pump it was given the regulation 2 coats of black Hammerite, and sealed with Tiger Seal, a very good silicone adhesive used in the automotive industry. A ton of ballast and 6 bags of cement were ordered for the base and I started digging a hole for the base approx 30" x 30" x 30". (It was at this point that I became rather poorly and ended up in hospital, so things were continued by our gardener and his son.) The hole was dug out, the concrete mixed and poured and 4 x 1m lengths of studding set in place. While this was setting, the trench was dug for the MDPE. Six metres of MDPE with the foot valve fitted was lowered down the borehole, a 90 degree elbow fitted, and the borehole capped with steel plate and concrete to keep it sealed. The MDPE was laid in the trench round to the concrete base, an in-line non-return valve fitted there and an old salvaged Yorkstone slab drilled and fitted over the studwork on top of the concrete. The pipework was fed through and attached to the pump and then the pump was bolted down into position. From there the MDPE could be laid properly in the trench, fed back to the elbow at the top of the borehole, cut to the final length and fitted. Within a dozen strokes, the pump was doing exactly what it was designed to do and at this point Ted and Richard (the gardener & son) took themselves off to the local hostelry to have some liquid refreshment from a different type of pump! They finished the job off nicely, the trench was back-filled, turf re-laid and everything tidied up. The trough was mounted on an assortment of old bricks and pieces of Yorkstone, and the mortar used for the trough base had a good amount of peat compost mixed into it to make it look old and hopefully to encourage moss and lichens to grow. The only thing that spoiled things was the missing cap. I came out of hospital a few weeks later and when able I started the search for a replacement cap. Once again, Leominster Reclamation came to my help - they had a cap that had been cast from an original, maybe not exactly the right size but close enough and much better than nothing at all. My grandchildren love it, they think it's great to pump the handle, fill the trough, then fill watering cans and water the garden for me. Well, it saves me a job! Would I drink the water? Well, I've tried a drop or two - it's crystal clear and it tastes fine but I think I'll just keep watering the garden with it. Was it worth all the time and money? I think the answer to that is a resounding yes! |
 |
| I must offer thanks to
everyone who has helped in this project: Dick Williams for a wonderful website and all his help in getting my project off the ground and working. Leominster Reclamation for the pump and cap. W. Robinson & Sons for the replacement plunger valve. Ted & Richard for all the help and hard work. My wife for putting up with my 'projects'. And all the surgeons, nurses and other staff at Hull Royal Infirmary for getting me back to whatever passes as normal so that I can still enjoy life. |